
Last time we talked about the frequency landscape, the range of human hearing, and specific numbers (in Hertz) that define midrange and sub-bass and all that.
But how did I get those numbers? How can I say that sub-bass is under 100hz? Where do I get the 100 from?
How did I make the connection between the tone we hear and an actual frequency in Hertz on my EQ knob?
Answer: spectrum analyzer.
Spectrum Analyzer is more than just a bouncing line. It's a connection between notes in the scale, and frequencies in Hertz that you can use for EQ'ing.
Get the Frequency & Pitch Chart right here to see more (free PDF).
Let me give you a super-basic introduction for people who have never used this before.
It works like this. Music comes in, and a picture comes out.
Spectrum analyzers show you a picture of your music, so you can see what's happening in all the different frequency ranges in real time. They're also referred to as a real-time analyzer (RTA).
Bass on the left, Treble on the right. This is the frequency landscape we live in.
By the way, the analyzer doesn't change your sound at all. It's only a measuring tool, not an audio effect. Different analyzers have all sorts of colors and layouts and options for how fast they respond to the input signal, etc. bla bla bla.
Here's a preset from the Ableton spectrum plugin:
WHY IT MATTERS
Spectrum analyzers matter because they show you things which are not immediately obvious to the ear, just like a scale can tell you the weight of an object when it's not obvious to your hand.
But there’s MUCH more you can do with spectrum.
Before I go deeper I want to bring the newbies in on a secret.
YOU NEED TO SEE THE MUSIC BECAUSE YOUR EARS WILL TRICK YOU.
You’ve heard this before; everybody always says it, “use your ears, use your ears, if it sounds good it IS good.”
This is solid advice, but...
...it stops working when the adrenaline kicks in.
Music is such an emotional thing, it can easily overpower your judgement and make you hear something that's not there, and make you ignore something that IS there.
When you’re psyched about a track you’re working on, your inner voice starts screaming like this:
“yeah man yeah this shit sounds great! You're crushing it! yeah turn it up!!! TURN UP THE BASS!! turn it up! turn it up! UP UP UP UP UP UP UP!”
With that going on inside your head, your feelings are focused only on the sound you LIKE, and you can't actually hear what is happening in the full mix.
It's sort of like ignoring the gas gauge when you're driving really fast.
See what I mean?
That’s not wrong, by the way. The whole reason we make music is because it feels good and it’s fun, right!
I'm not telling you to stop having fun in the studio.
But don’t do it like a DJ in the club, don’t crank up the bass knob when you’re loving the drop. That’s for performing, not for studio production.
The Spectrum plugin helps you understand what is really going on in the mix, without being influenced by how much you like the music, or by your room acoustics, or by the limitations of your monitors, or by how much you love the track.
And its not a newbie thing. Even mastering engineers use spectrum analyzers.
At the bottom there are some exercises you can to to start learning how to use spectrum. Now let’s go deeper.
THE SECRETS OF SPECTRUM
Spectrum connects Hertz to notes in the scale, which means it connects EQ to key signature.
This is an incredibly powerful tool. Most people don't even realize that you can think in terms of key signature (or individual notes) when you're EQ'ing.
But you can, and spectrum gives you the tool to find specific frequencies for individual musical notes, so you can dial in your eq settings with exact numbers, and bring every sound into the key signature of the song.
Grab the Frequency & Pitch Chart right here and keep these numbers handy:
Let me say that again.
Spectrum connects EQ to key signature. It gives you numbers in Hertz for pitches in the scale, so you can cut & boost the exact notes in your bassline, tune your kick drum to the bassline, and EQ a vocal without ruining it.
Want space in your mix? This is how you know EXACTLY what to keep and what to get rid of.
I made a shortcut for you.
This Frequency & Pitch chart shows each note in the 12-tone scale and gives you its numbers in Hertz, through all the octaves we hear.
Download the free PDF and print it out for your studio wall.
EQ’ing your tracks is not about using the same frequencies on every song.
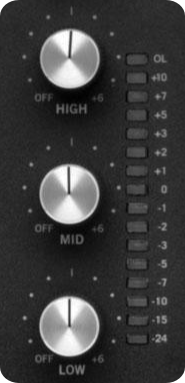
EQ in production is not like EQ on a DJ mixer where "LOW" "MID" and "HIGH" are at preset frequencies.
Every song is in a different key signature, and each key signature is centered on a different note, so that means...
you need to use different frequencies to EQ every song.
EQ’ing is about bringing out the harmonic content of your sounds to help the instruments “sing” together.
Understand this connection and you'll be able to narrow down your EQ frequencies and get specific.
At the bottom you'll find exercises to start doing it.
Did you download the chart yet?
A WORD ABOUT DRUMS
Even with non-pitched sounds like percussion, you can still EQ them using harmonic or "mix-in-key" frequencies.
I’m sure you’ve heard people talk about tuning the kick drum to make it a 5th above the bassline, etc? That’s what this is all about.
As electronic producers, we have the amazing advantage of being able to tune all our samples and put them in the right harmonic context.
But drum tuning and EQ’ing was not always about pitch-shifting digital samples.
STORYTIME
In the 1970’s, when rock bands had massive budgets for recording, they would make a different drum kit for every song.
They would rent 25 different snare drums on a session and keep them in the studio, to have options for tone and sound, just like we choose a rack of hihat samples and snares to detail our electronic music.
They had people called “drum techs” whose entire job was to tune the drum kit differently for every song.
Can you believe that?
It was the acoustic-analog version of making a drum rack or a Sampler instrument!
What they would do was tune the snare drum, rack toms, kick drum and floor tom to “ring” on a pitch that fit with the key of the song, for EVERY SONG.
THEY. TUNED. THE. ACOUSTIC. DRUMS. TO. MATCH. EACH. SONG.
Can you imagine that?
Nobody today would bring seven different drum kits on tour to play different songs during the show, but in the studio this is exactly what they did.
And YOU can do that with drums in your session too, now that you know how to use spectrum to see the frequency of notes.
It’s one of those subtle things you don’t really notice in a track where everything sounds right. Sympathetic vibration. Constructive interference.
But when the drums are badly out of tune with the song, it sounds awful. Every hit sounds like a disturbing clash, and there is NOTHING you can do to fix it.
No amount of EQ’ing or pitch-shifting can fix destructive harmonics in an acoustic drum recording.
It’s possible to tune acoustic drums by ear and make them match a note from a bass, piano or a tuning fork if you wanted to.
But we don’t have to do that.
Because, what do we have here?
We have spectrum Analyzer, WOO HOOOOO!!
It’s a super-wizard-genius plugin that you can use with your mouse to locate any note you want and read its frequency (even when there’s not music playing).
Grab the Frequency & Pitch Chart PDF and put it to use in your sessions.
You can do it the other way too. You can play any audio file, look at its spectrum line, put your mouse on a bump in the line, and find out what note that frequency is pushing up.
Notes. Frequencies. Music. Hertz. EQ.
It's all starting to come together now...
If you know just a little bit of music theory, you can set EQ’s for every sound in the mix just by knowing the root note or tonic of that key sig.
This is the secret of the spectrum analyzer. It’s an amazingly powerful mix tool that tells you EXACTLY where to EQ your sounds.
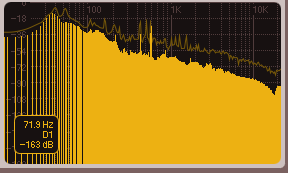
THE LITTLE BOX
In Ableton, the Spectrum plugin shows you pinpoint frequencies of notes, their position in MIDI octaves, and also their volume level in db.
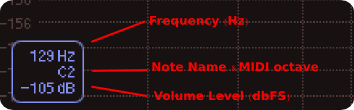
You will see this box in the lower left-hand corner of the spectrum window.
Now let’s do some activities so you can learn this hands-on.
EXERCISE 1: SETUP SPECTRUM
Open up Live9 and drop spectrum analyzer on the master channel.
First setup the spectrum analyzer with fast reaction time so it is very easy to see each sound when it happens.
That’s important for visually catching the sound you hear so you can read its frequency.
Copy these settings:
Easy, right?
You need a fast response time to see each element of the mix pop up exactly when it happens. Without that you will never be able to figure out the connection between single notes and exact frequencies.
Now you can actually see individual bass notes, kick drum beats and other sounds.
EXERCISE 2: EXPLORE THE FULL RANGE OF SOUND
Notice that when you move the mouse left and right, the box updates the Hz and note names.
Explore the full range to see how low it goes and how high it goes.
Remember the range of our hearing? We can hear from 20 Hz to 20,000 Hz.
Look at 20 kHz. What’s the note at the top of our hearing? What MIDI note is that?
What’s the note at 20hz? What note is that on a piano keyboard? What octave is that in the MIDI note system?
Get familiar with the note names and MIDI octaves so you can understand how the low note of your bassline interacts with the kick drum.
Notice that the spectrum analyzer note scale runs out after G8, the eighth octave. This is because a piano keyboard only has 88 keys, but the MIDI specification has 128 notes.
EXERCISE 3: DECIBEL LEVELS
Another little detail, when you move the mouse up and down you can find the decibel level of the sound at that point.
Now drag some professionally mixed and mastered songs into a blank session.
Play them and put the mouse on the maximum peak line. Read the db levels in all the regions of the song, low end, vocals, etc.
How loud is the kick drum in a mastered track? How loud is the snare? What decibel level is the vocal riding?
Spectrum gives you a tool to measure the volume of each frequency within a mix, so you can compare it to your own tracks and have a target to aim for.
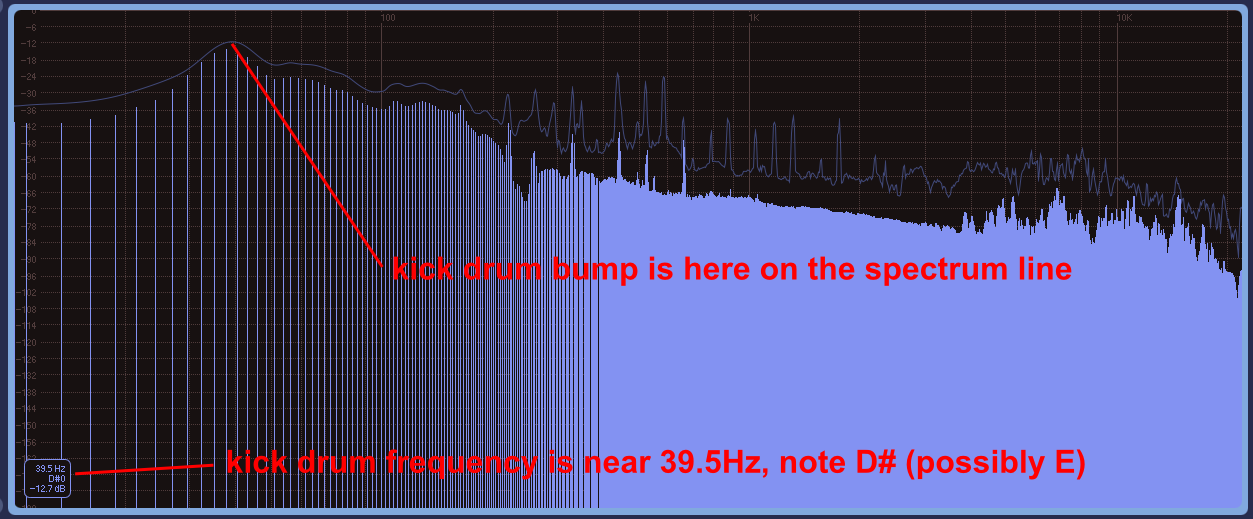
EXERCISE 4: FIND SOUNDS YOU HEAR ON THE SPECTRUM LINE
Drag a finished song into a session, play it, and watch the line on Spectrum.
When you hear something distinct like a kick drum, put the mouse on the line right where that sound pops up, and read the Hz from the little box in the corner.
The box will tell you the frequency you're looking at, the name of the MIDI note associated with that frequency, and the volume level.
We don't have enough space to talk about all the ways you can use this info, but if you start paying attention to it now, you will find that you understand how to use EQ a lot better.
EXERCISE 5: COMPARE YOUR TRACKS TO PRO MASTERS (soul-crushing terror)
It’s a good idea to compare your tracks to other professionally mastered songs, using spectrum, to see if your mixes look like what the pro mixes are doing. (they don’t)
In fact I often drag a few pro-mixed songs into my production sessions to look at them when I’m going through my rough mix. (to drive myself crazy)
I bring in songs from the same genre and tempo, solo them to see how they appear in the Spectrum, and then mute them to look at my own mix in the same spectrum window. (then I hide under my desk and cry)
It’s a great way to get a real picture of your mix. (or give up producing forever)
By the way when you do this, don’t try to match volume of the pro-mastered song. (you will instantly be sad)
Only try to match the look of the different frequency ranges as they pop up on the spectrum line.
Here's what a kick drum looks like inside a full mix.
Here's a bassline note happening at the same time as a kick drum. See how they each have their own separate peak in its own space? (I know the little box is showing the bassline note because that's where the mouse was when I took the screenshot)
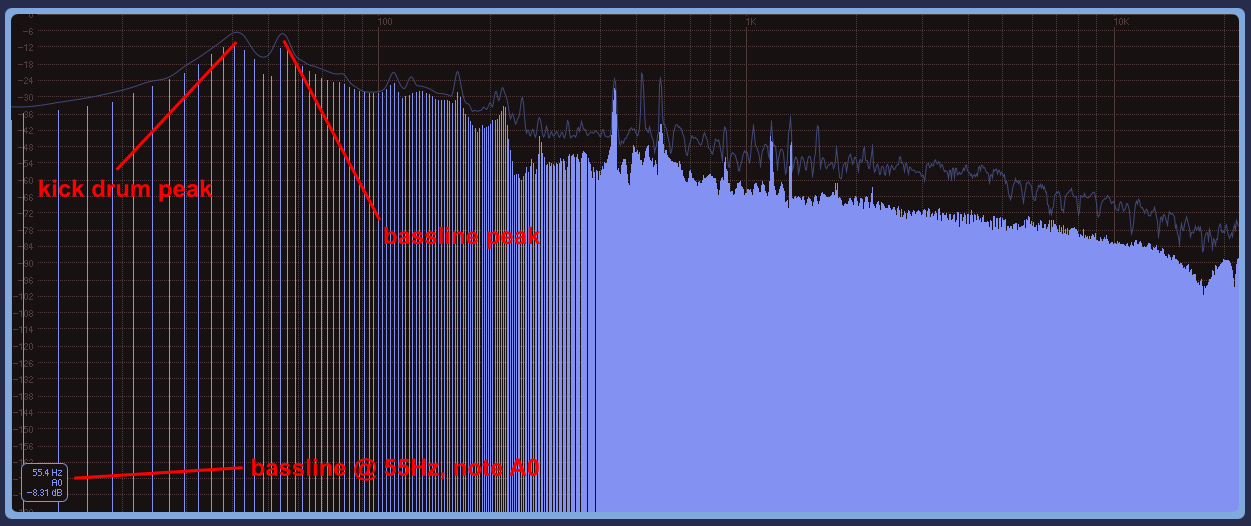
It might be a dumb thing to say, but when I can see each sound clearly in spectrum, usually I can hear each sound in its own mix space too.
SUMMARY
Spectrum analyzers do a few really powerful things to help you.
1) They give you a reference point to visually compare your mixes to other tracks
2) they show you the volume level of individual frequencies within a song
3) and they connect Hertz to notes, the first step of thinking harmonically when you use EQ.
Next time I will run down the list of EQ and Filter types and tell you what they are, where you find them and what they’re used for.
We’ll answer the questions — What is LPF, HPF, BPF, Parametric, Notch, graphic EQ?
And these are leading up to something great...
it's called "FREQLAND"!
FREQLAND is a course on using EQ and Filters to solve real problems from mix sessions.
If you want to come with us and keep learning, check out the FREQLAND course where you LEARN BY DOING with hands-on exercises inside real multitrack Ableton Live sessions.

